Posts

Showing posts from July, 2018

TA Basics: Element selection with the lapis_lazuli gem

Image
In case you've never head of the phrase "All Roads Lead to Rome", it refers to the fact that many routes can lead to a given result. The same counts for finding elements on your website under test. There are many attributes which can be used to find the element you need. So let's have a look at a bunch of functions/options with the `lapis_lazuli` gem to limit the amount of roads a bit but still keep the test reliable. Side note Let's start with something I mentioned in a previous post , but it's good to keep in mind. The ` lapis_lazuli ` gem is an extension build on top of the ` watir ` gem. Even though I focus on LapisLazuli functions, you can also use the Watir way instead to locate the elements or even combine the two to a certain extend. Documentation All LapisLazuli documentation for locating elements can be found on the testautomation.info website. And also on github , but this is less complete. Since most of the element selection information

Android statistics: July 2018

Image
Finally new statistics have been released  by Google. They skipped June and most of July and I think they forgot to update this page  until I asked them about it.  So what changed since the published Android statistics of May 2018 ? Does Oreo have more market share than KitKat? Will Nougat keep on gaining market share or did it reach it's peak? Let's find out, here are the facts. https://developer.android.com/about/dashboards/ Statistics, facts and trends Versions over time Click to expand versions over time image. Facts about the Android versions compared to previous month: The landscape is now a jungle of versions with no outstanding dominant version and three versions around +-10% market share Android 8.1 finally started to gain some significant market share Android 8.0 is goin up fast (past Android 4.4 & 7.1) Android 7.1 is still increasing in market share, passed Android 4.4 now Android 7.0 was expected to stay stable a bit longer, but is decreasi

Selenium-grid - A simple desktop setup on Windows

Image
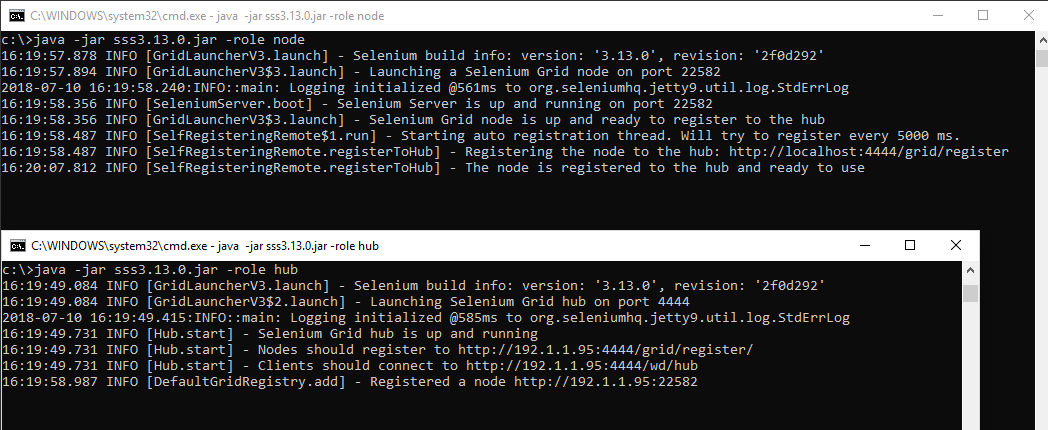
Using a selenium-grid can have many advantages, especially on bigger projects. One such advantage is that you can run many tests in parallel. Another advantage is that you only need to run your tests to one point (the selenium-grid hub). The hub will sort out if it has a connected node that is matching your request and if so, it will serve your tests to that node. Selenium grid Assumptions/preconditions You know how to download and install Java (from java.com ) You know how to download the webdrivers (also previous post) You know how to add a PATH to the PATH variable of Windows (see  Google ) Make sure Java and the webdrivers are in the PATH variable Start the hub Download the Selenium Standalone Server  and run this in the commandline: java -jar <filedir\filename>.jar -role hub Allow the firewall setting if/when this pop's up. Start the node java -jar <filedir\filename>.jar -role node This will just register the node to the hub with some de

TA Basics: How to use the helper files

Image
When you just start with test automation, you most likely search and interact with elements within your `*_steps.rb` files (the files that contain the precondition, interaction and validation steps). So most likely across the steps, you have repeatedly located and interacted with the same elements a couple of times. And as long as your test suite is small, adjusting it only takes a small bit of time and it works, so who cares, right?  But now imagine you have a 100 scenario's, 100+ (precondition, interaction and validation) steps. And in a bunch of them you've locate the same element. But because of a change in the website this button cannot be found anymore. Are you going to adjust this in every line in your code to fix? Your answer should be: "NO!". You could use nested steps , but this becomes really confusing really fast and is not a good practice. So let's have a look at a proper solution, the helper files. Structure We basically define four main layers i

TA Basics: Adjust scenario's and steps

Image
You now have this beautifull generated test automation suite and you want to adjust it to your needs, but have no clue where to start. Don't worry, because that is exactly what we're going to cover in the next couple of posts. In this post we'll add a new scenario, make some small adjustments to a step, add a new step and run only that one test to check the results. Cucumber Let's start with a test run with Cucumber. Navigate to the folder in which the tests are stored. So in this case in ` C:\TA\testproject `. In this folder type ` cucumber ` and hit the enter key to run all tests from your generated test suite. But you can also run a limited set of tests. To do so, you should make use of tags in your scenario's . To run only one test you can run it like this ` cucumber -t @whatever `. It will now only run tests that are matching this specific tag and ignore all others.  Add a scenario and run it Let's start with adding a new scenario. For example